So, we have been doing e-mealz for a year now, and I love it. I love not having to come up with meals for us to eat every night and having the same thing over and over again. I think maybe one meal has been repeated all year and that was okay, because it was one of my favorites. I have repeated some of them myself, because we just loved them that much.
Tonight was one of those nights. I made some really awesome French toast. I am going to give you my variation on it, because the original recipe called for croissants to use for the bread and I just thought that may be way too rich.
Banana Pecan French Toast
French Toast
2 eggs
1/2 c milk
1/2 t cinnamon (I just sprinkled it in until it looked good to me)
1 loaf French bread sliced (I sliced my bread about an inch thick.)
3 T butter (for greasing the pan)
Whisk eggs and milk together. Stir in cinnamon. Butter heated pan. Dip bread in egg mixture on both sides and place in pan. Cook until lightly browned.
Syrup
1/2 c corn syrup
1/2 c maple syrup (I just used our regular syrup. Nothing fancy here.)
1/4 brown sugar
1/2 c chopped pecans
2 bananas, sliced
Heat corn syrup, maple syrup, brown sugar, and pecans in saucepan over medium heat until it starts boiling. Reduce heat and simmer for two minutes. Add bananas and stir to coat. Serve on top of French toast.
Tuesday, December 6, 2011
Monday, November 7, 2011
Smucker's Peanutty Snack Mix
I found this recipe on the jar of our peanut butter and I thought it sounded good. Since I can't seem to find it online so that I can "pin" it, I am going to save it here.
1/4 cup butter
1/4 cup peanut butter
1 tsp vanilla extract
1 tsp ground cinnamon
4 c honey and nut breakfast cereal
1 cup honey roasted peanuts or roasted peanuts
1 cup mini pretzels
(optional: cayenne pepper to taste) (I would probably leave this out)
1. Heat oven to 350 degrees. Line rimmed baking sheet with foil.
2. Combine butter, peanut butter, vanilla, and cinnamon in a microwave-safe bowl. Microwave on high 35 to 45 seconds, stirring until well blended.
3. Combine cereal, peanuts and pretzels in a large bowl. Pour butter mixture over cereal mixture. Toss well to coat. Spread mixture evenly on baking sheet.
4. Bake 10 to 12 minute, stirring occasionally. Cool. Store in resealable plastic bag.
Monday, September 19, 2011
Muffin Tin Monday
I meant to post some other things this past week, but obviously that hasn't happened. Here is our muffin tin meal for today. Plain yogurt, tomatoes, veggie muffins, ham, grapes, and mozzarella cheese.
The veggie muffins were a hit. I made them during nap time, and even though I forgot to get eggs at the grocery store today, they turned out okay. I added some applesauce and a little extra yogurt to counter my lack of eggs. They probably would have risen a bit more, but I'm not going to complain. The ham and cheese weren't really eaten today, but since we had a melt down in the middle of lunch, I guess that is understandable.
 Plain yogurt, tomatoes, veggie muffins, ham, grapes, and mozzarella cheese.
The veggie muffins were a hit. I made them during nap time, and even though I forgot to get eggs at the grocery store today, they turned out okay. I added some applesauce and a little extra yogurt to counter my lack of eggs. They probably would have risen a bit more, but I'm not going to complain. The ham and cheese weren't really eaten today, but since we had a melt down in the middle of lunch, I guess that is understandable.
Monday, September 12, 2011
Muffin Tin Monday
 From left top: grapes, plain organic whole milk yogurt, pluots, colby jack cheese, whole wheat crackers, and ham (please excuse the dog chewed spoon. I didn't notice it until after I had taken the picture.)
I recently found the blog Muffin Tin Mom and thought her idea of using muffin tins for meals was a unique and interesting one. C really likes to have things in their places, so I figured having everything in his meal in its own separate spot would be right up his alley. I have fixed a couple of his meals this way and he usually eats them up. Today he really seemed to like the pluots, the yogurt, and the crackers.
Friday, September 9, 2011
Crafty and Free Storage Bins
I found this storage bin while perusing Pinterest recently.

I thought it was a pretty cool idea, but since we cloth diaper I don't really have a problem with diaper boxes laying around. I do, on the other hand, have wipes boxes that were given to us with hand-me-down clothes. So, I thought that I could probably use those. Also, since I didn't want to buy anything, I decided to paint my boxes with chalkboard paint that we already had and line them with fabric I was given. So all in all, this project was completely free. I didn't even buy the original wipes!
Here is a look at what I started with and what I ended up with.
 On the left is a wipes box that I haven't done anything with yet, and on the right is my completed project.
Here is a quick how to:
1. cut lid flaps off box
2. paint box with chalkboard paint (I painted 3 layers and alternated the direction of my brush strokes between layers)
3. sew liner for box (Here is the basic tutorial I used. I just didn't make ties for mine, because I am pretty much a somewhat straight line sewer and I didn't want to get too difficult.)
 This is a picture of the progression of my boxes. (from left: plain box, one coat of paint, two coats of paint, and finished product.)
I'm not going to detail how to make the liner, because I am not the best at sewing and I doubt that I could explain it very well. This project took me a little more than two nap times, so that is probably about 3 hours total, not including waiting for the paint to dry. I haven't written on them yet, because they are supposed to cure for 4 days.
I am going to use these in our loft area that I am slowly (very slowly) turning into a play/learning space for C. When I finally get that finished, I will have to post some pictures.
Friday, June 10, 2011
June 2011 Ten on Ten plus one
Today I participated in Ten on Ten from A Bit of Sunshine. I took a picture an hour for ten hours. It was nice to take pictures just to take pictures, and I ended up with a neat snapshot of my day.
 8 Good Morning Sunshine
 9 Freshly Made Bed
 10 Nap Time
 11 Sunning
 12 Lunch
 1 At Play
 2 Project
 3 Present
 4 Hands on the Wheel
 5 Party Time
 *bonus: 6 Party Girl
A Winner of a Dinner
One thing I struggle with nearly every day is what to feed Mr. C. He will pretty much eat anything, so that isn't the problem. The problem is that I want to give him things that are good for him, but that are also easy for a baby with barely one tooth to eat. I have found a few websites that help me out a lot in this area, but I also like for him to eat what we're eating. It saves a lot of time to not have to make two meals.
Last night, from our e-mealz menu, we had chicken pitas. Well, I cut up the chicken, cucumber, tomatoes, cheese and pita bread and made a very pretty plate for Coleman. 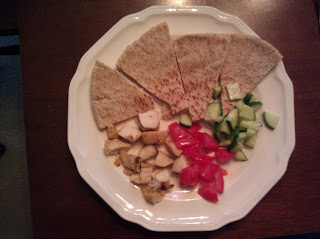 (Please excuse the quality of these pictures. Sometimes I am just too lazy to use the good camera)
 (Please excuse the quality of these pictures. Sometimes I am just too lazy to use the good camera)
I also struggle with knowing how much to feed him. Food is something I have gotten no help on from the pediatrician. I thought they would at least give some guidelines, but mine hasn't at all.
Anyway, I just have to say, that this meal was a total success. All of us were part of the clean plate club last night.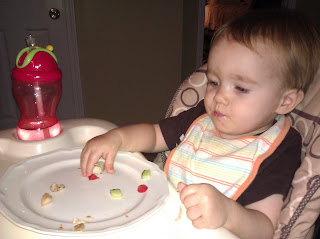
I want Coleman to be a healthy eater but I don't want him to be that kid who never gets treats. I guess I am still trying to find a balance as well as figure out what constitutes good meals for a one year old. Any suggestions?
Here are a few websites that have helped me figure out what to feed Mr. C and when:
Wholesome Baby Food: This website has handy printable charts for what foods should be offered when. I tried to offer most of the foods on the chart, but sometimes it had stuff that we never really eat, so I didn't do everything.
The Homemade Babyfood Recipes Blog: This has some fun and easy recipes that are tasty not only for babies, but for adults too.
Anyway, I just have to say, that this meal was a total success. All of us were part of the clean plate club last night.

I want Coleman to be a healthy eater but I don't want him to be that kid who never gets treats. I guess I am still trying to find a balance as well as figure out what constitutes good meals for a one year old. Any suggestions?
Here are a few websites that have helped me figure out what to feed Mr. C and when:
Wholesome Baby Food: This website has handy printable charts for what foods should be offered when. I tried to offer most of the foods on the chart, but sometimes it had stuff that we never really eat, so I didn't do everything.
The Homemade Babyfood Recipes Blog: This has some fun and easy recipes that are tasty not only for babies, but for adults too.
Subscribe to:
Posts (Atom)